You can see that HERE, but when you click on the link, it takes you to a page with a ton of other pics and I couldn't find this one, so I don't know where the original post is from.
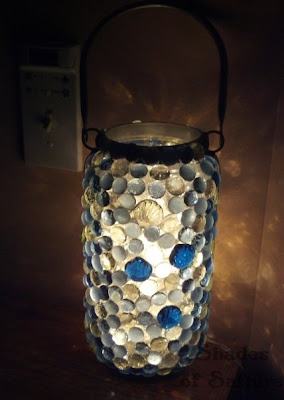
Here is my rendition of it:
I used a LOT of glass pebbles and 2/3 of them really were blue, but the blue didn't show up as well as I'd hoped when I lit it up. There were also only 6 bigger dark blue pebbles. It gets the job done, though :) I hope to make another one using all dark blue pebbles of varying sizes with only a few clear ones in hopes of getting a more blue affect than this. I like it, I just would love a bluer one ;)
So lets get started:
So I was browsing around Big Lots for a nice glass bottle or something to use for this project when I came upon this beauty. What makes it so nice is that it is actually a tea candle holder and the bottom is removable so you can change out the tea light. I decided to go with this because it would save me from having to get a diamond drill bit to drill into the glass with. I could just remove the bottom. I also had a 20% off coupon. Score! :)
In the same trip to Big Lots (and with the same 20% off coupon for the entire purchase), I also found the glass pebbles. This bag of pebbles was $5, so I wound up paying $4 for it. I picked up the Aleen's Glass and Bead Adhesive at Joann Fabric store (in the area where they sell all kinds of adhesives). It's important to use glass adhesive and not hot glue because hot glue will just come apart in no time. I can't tell you the number of craft things I've gotten as gifts that were gorgeous when I received them, but they were done with hot glue and in no time I was having to re-glue the items that were glued with that stuff. Glass needs to be glued with glass adhesive :)
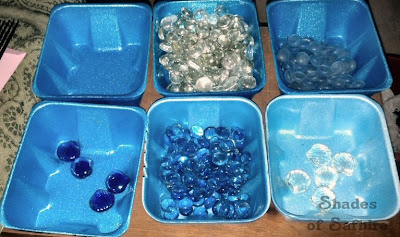
The first thing I did was sort the different colored pebbles so I could vary them as I was applying them to the candle holder:
Then just start glueing the pebbles onto the glass in whatever arrangement you desire. One thing I found out is not to use TOO much glue or the pebble would slide all over the place. The directions say "small amount" and I guess they know what they're talking about :) Follow the directions on the glue as it tells you to apply the glue to both surfaces you plan on adhering together then wait a few minutes and then put them together and press and hold.
This was the hardest part of the whole project. The more pebbles you adhered, the heavier the project got and the pebbles would make each other slide all over the place. For ME with the type of glass candle holder I used, what worked best was starting at the sides where the metal part goes down the sides of the "jar" (for lack of a better word). I could glue the pebble on right next to the metal bar and the pebble rested against the metal bar. Then work my way away from the metal bar gluing pebbles next to the one I'd just glued on as the metal bar kept the pebble from sliding any farther. (I hope that makes sense lol).
Apply the pebbles to half the glass and after the pebbles seem like they have stopped trying to slide around, you can leave it laying on it's side for 24 hours while the glue hardens and cures.
(See...I actually have at least 2/3 of the surface covered with BLUE! You just can only see the DARK blue as being blue when it's lit up). I wish I'd have realized this before they were all glued on. But like I said...I think I'll be tackling this again with mostly dark blue pebbles this time :)
When you have half the pebbles glued on and it has sat for 24 hours, roll it over onto the pebbled- side and do the other side and let that set for 24 hours as well.
If you don't have a glass container like I did that has an opening in the bottom, you'll have to drill a hole in the bottom of the side of the container big enough to fit your Christmas lights in. I've never done that before, but from all I've read, you probably need a diamond bit for your drill to do that. I took the lazy way out lol
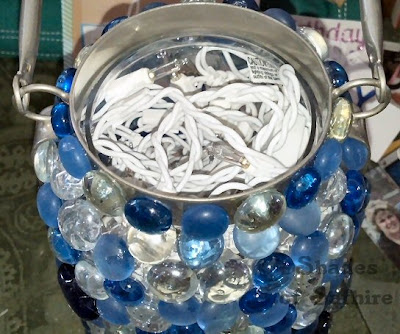
Instead of buying new lights, I just went into my Christmas stash and pulled out this box of lights that I'd never opened. I'm a colored-lights kind of girl at Christmas, so I don't use many clear/white lights, so I'd never opened this box. In fact, I'd bought this on clearance at a drug store not long before I'd gotten married intending to use it to decorate the church altar for the wedding, but we never got to it in the decorating process.
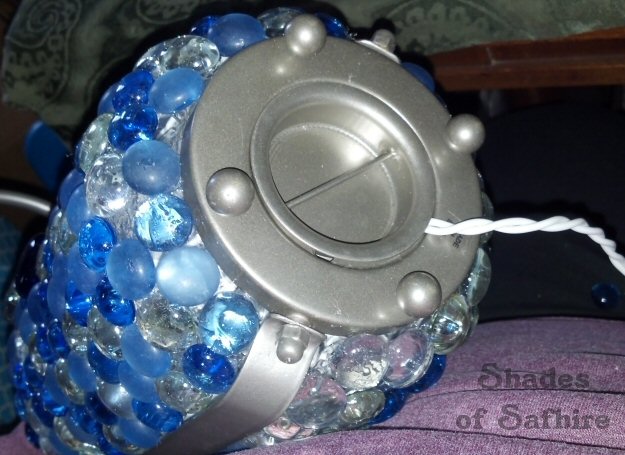
Here you can see the bottom of the container I was talking about. The bottom just unscrews for the original intention of changing out the tea light. It was pretty cool :) I thought I'd have to alter in in some way so it would still be able to screw back on and still hold the core without pinching it, but it screwed back on loosely and didn't pinch the cord at all. (Again...check out ALL THAT BLUE!...that didn't show up in the dark) :)
I just stuffed the lights in there and pulled the male end of the cord out the bottom. I didn't put anything over the top as I thought it might already be a little hot and thought leaving the top open would keep it from getting overly hot.
And there you have it :) My new night light for our hallway between the bedrooms and bathrooms.
I look forward to my next trip to Big Lots to buy another glass candle holder and then go to Hobby Lobby where I've seen nice DARK blue pebbles hehe. But that's for another post :)
One thing that attracted me to this project was the way the original picture showed the pebbles reflecting onto the wall around it. Mine is reflecting some, but I think the dark blue might reflect better. (Ok, so you know by now that I LOVE blue! hehe)
Happy night light creating :)


