Keep in mind this is my very first tutorial, so bear with me as I stumble my way through :)
This is what I have done so far on this particular afghan. (It's straight, I promise. It looks crooked because it isn't finished yet so it's laying kind of crooked when I took the picture. Also the purple is a really soft purple, not as dark as it looks in this picture.
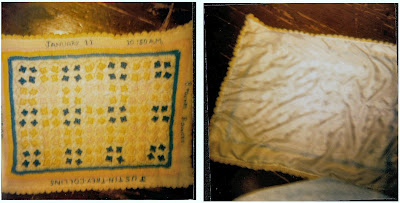
Here's a picture of a baby afghan I made for a friend way back in 1983 or so. There were no digital cameras back then so this was taken with a simple old instamatic camera (I'm showing my age lol):
So as you can see, there are several different ways you can arrange the flower-ettes in your design. In that afghan, I put a silky fabric backing on it. I plan to put a white fleece backing on the one I'm working on right now.
Here's a close up:
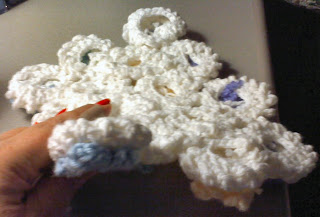
and a side view:
Ok, here we go :)
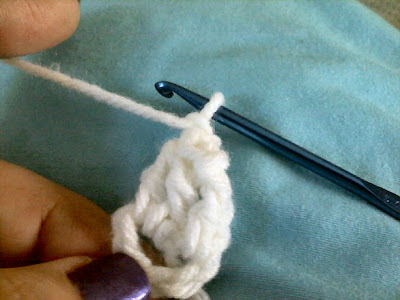
With the color you want the petals to be, crochet 5 chain stitches and then slip stitch into the first chain to form a circle. Then do 5 more chain stitches:
The next 3 stitches will be triple crochet to form 4 stitches in all (the very first one being the 5 chains in the first petal)
So at this point you should have four stitches into the circle:
Take the crochet hook out of the last stitch you worked and put it into the top of the very first stitch (which is the 5 stitches after the circle you crocheted).
Then hook back into the loop you left again forming a slip stitch and pull it tight so the petal curls
chain stitch 2 and then triple crochet into the circle again. Do this 3 more times for a total of 4 stitches to form the second petal:
Continue the same to make a total of 4 petals.
Crochet 2 chain stitches:
Slip stitch into the top of the first petal and pull tightly and cast off. You'll then be ready for the second color:
With the second color, double crochet into the 2 chain stitches between the petals. Then chain one.
Do this 3 times for a total of 3 stitches
Chain one and repeat the process into the next chain 2 stitch of white so you have another section of 3 stitches. Do this again till you have 4 sections of 3 double crochets between the petals:
When all four sides have their respective 3-double crochets, slip stitch into the first double crochet of that round. Then crochet 5 chain stitches like this:
After the 5 chain stitches, triple crochet into the next stitch:
Continue the triple crochet, chain one pattern all the way around till you slip stitch into the first stitch of that round:
Chain 2 and double crochet into the first triple crochet stitch.
Double crochet into each stitch in that round (no chain in between the double crochets like you did in the first round - just double crochet all the way around). Crochet this round tightly as this round is what forms the 3-dimensional effect
When you finished this, the back of the flower-ette will look like this (a hollow arrow in the middle of the flower-ette):
The front will look like this when you're finished:
That's it for the flower-ette! Then just make as many of these as you need for the afghan in as many colors as you decide you want your pattern to be. Then join the flower-ettes together with yarn and a yarn needle in the layout of your choice. This will be a very warm afghan for any little one since it's really two-layers as you are left with a puff-effect.
When you have it all done, you can crochet a border around the edges in whatever edging you decide. For the one I made 20-some years ago, I did it like this. I used yarn and a yarn needle to stitch the baby's name and birth information onto the borders too. :
I put a backing on this because the back looks like this and I didn't want a baby to get his little toes or fingers in the open places on the back:
You can line the flower-ettes up in squares, or straight lines or any number of combinations. Just use your imagination and be creative!
You can line them up without big spaces between the flower-ettes:
Or like I did my old one leaving big spaces between:
I hope I made sense in this -my first tutorial :) If you have any questions or input, just leave a comment!
Happy crocheting!


Those flowers look just lovely! So cool! Looks like a great tutorial too - nice and clear!
ReplyDeleteThanks for linking to a Round Tuit!
Hope you have a fabulous week!
Jill @ Creating my way to Success
http://www.jembellish.blogspot.com/
Thank you :) I'm just getting my blog off the ground, so I appreciate your reply! Thanks for hosting your link party for new bloggers like me to join the community! Have a great day! :)
DeleteThis looks really lovely! I am only a beginner crocheter but these look doable :)
ReplyDeleteSarah @ A Cat-Like Cusiosity
Thanks for your reply, Sarah! You can do it :) It looks more difficult than it is, really :) I appreciate your reply as I'm just getting my blog off the ground and am eager to make new blogging friends and join in the community. On my way to check out A Cat-Like Curiosity!
Delete